
Cutting Granite Countertops
When in doubt, get a new (sharp) blade... also make sure to wear your PPE!
When we bought our house, the previous owner had split the house into two units, and was renting the lower half. Therefore, when we started thinking through our kitchen renovation, we were essentially trying to combine 2 different kitchens into one. We pulled almost every cabinet off the walls, re-arranged lower cabinets, and shuffled around where appliances went. This ultimately meant cutting and modifying our granite countertops. Before we just assumed we'd bring in a professional crew to modify the countertops, Dave thoughts he'd at least test out whether we could cut the granite ourselves. Turns out, we could. With alot of patience and a little muscle.
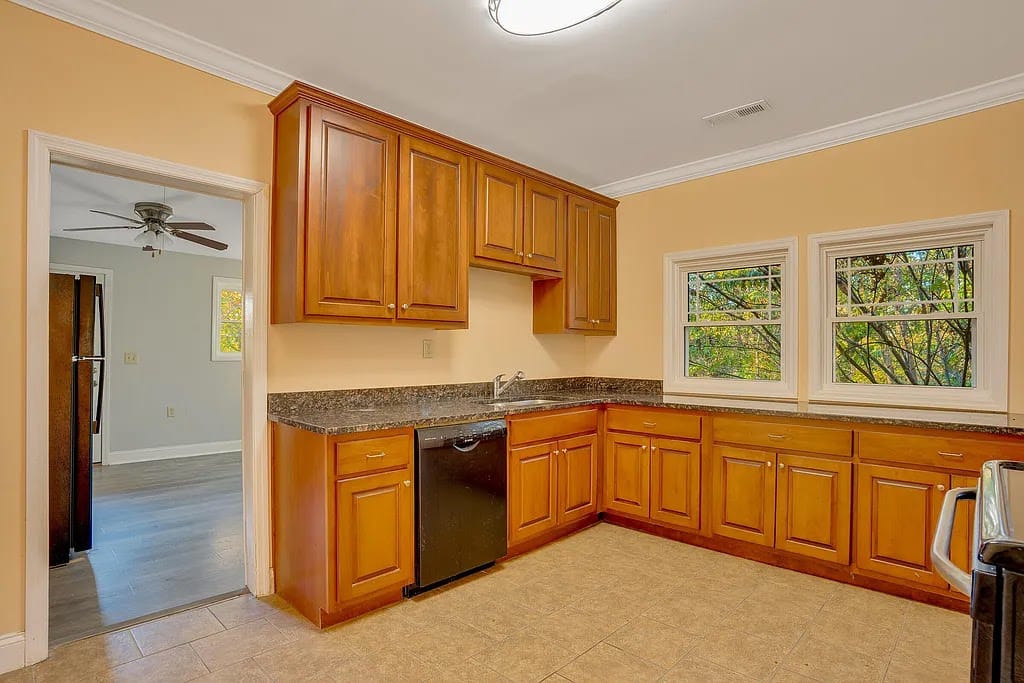
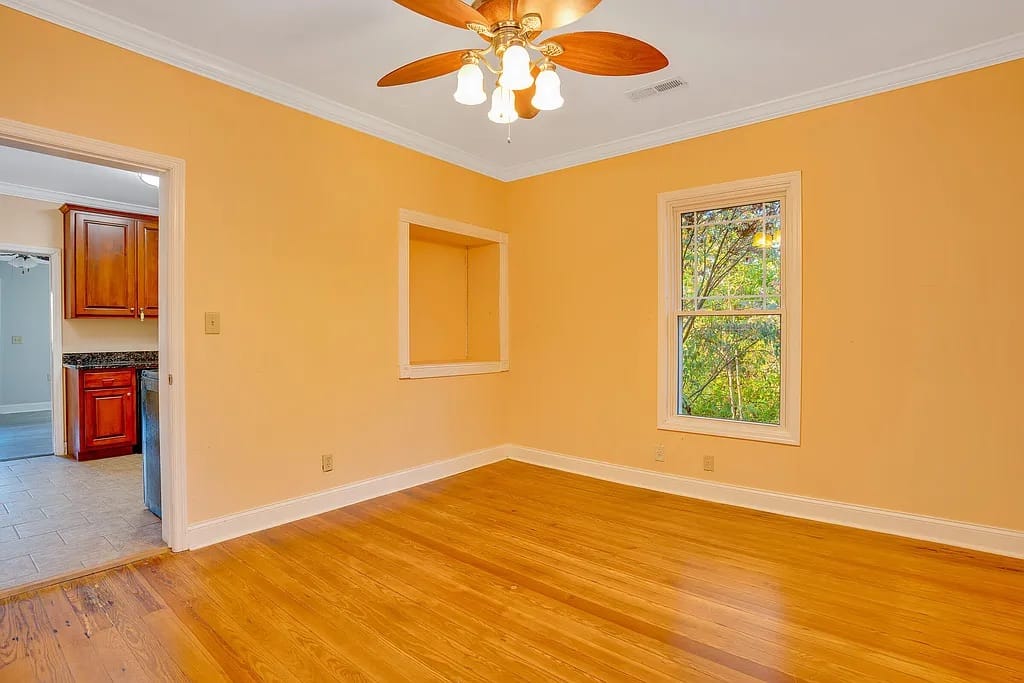
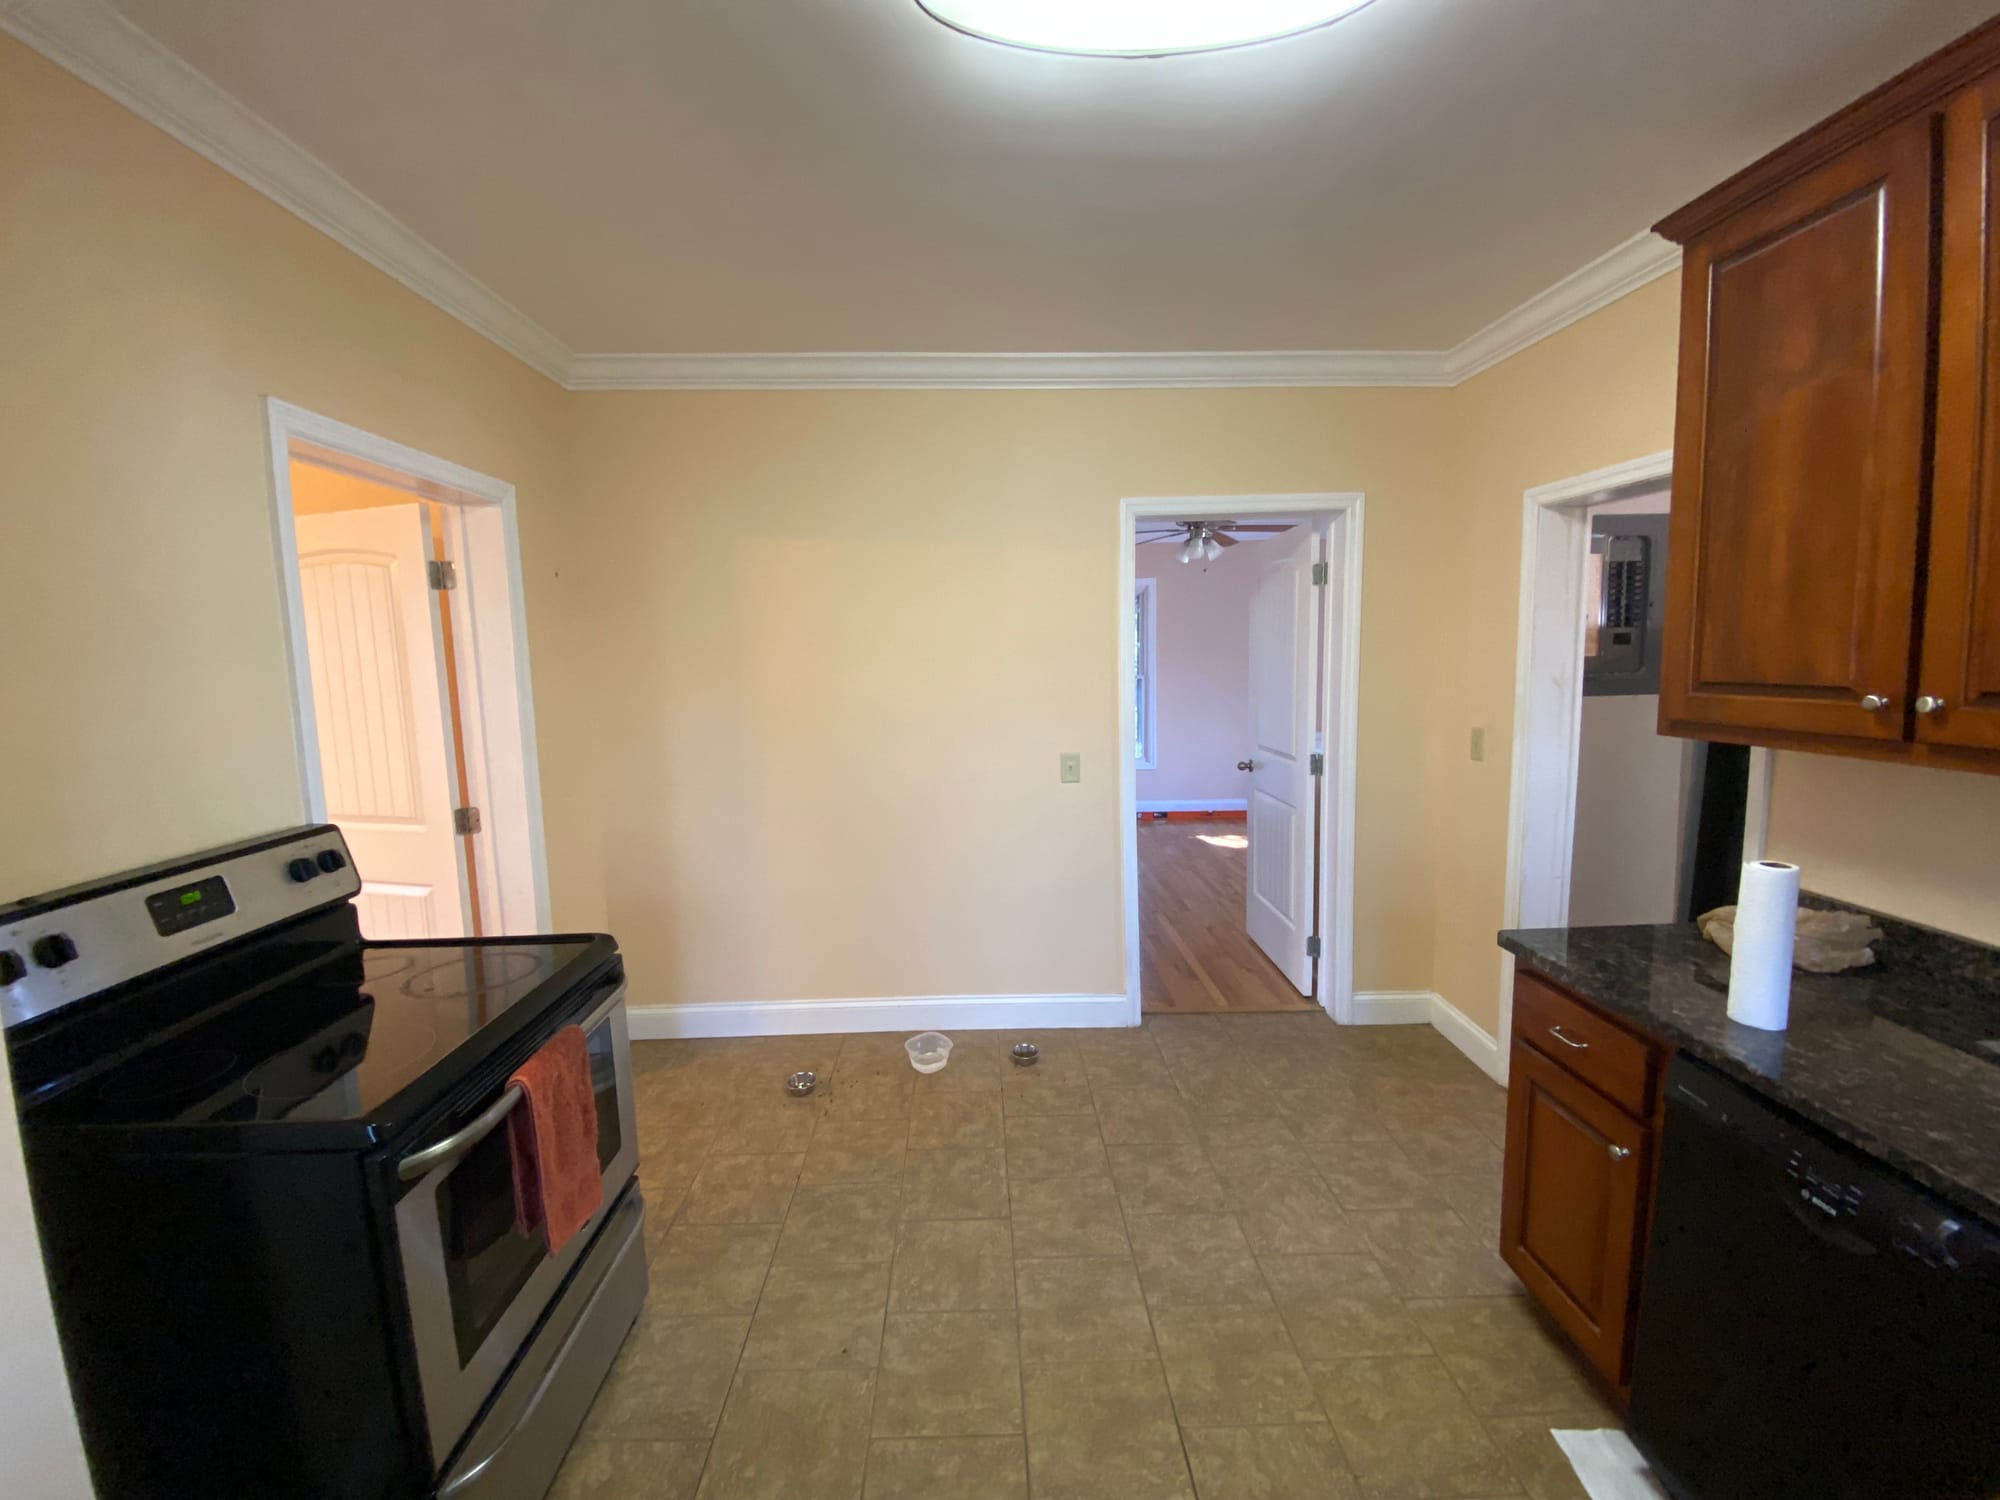
Let's start with what we were working with. The original design of the kitchen had all wall cabinets along 1 wall and the countertops creating an L shape. The stove was sitting by itself along another wall (see bottom right of pic below). We wanted to move the stove to a spot that made the kitchen flow better, and had counter space on at least one side (it's the little things)
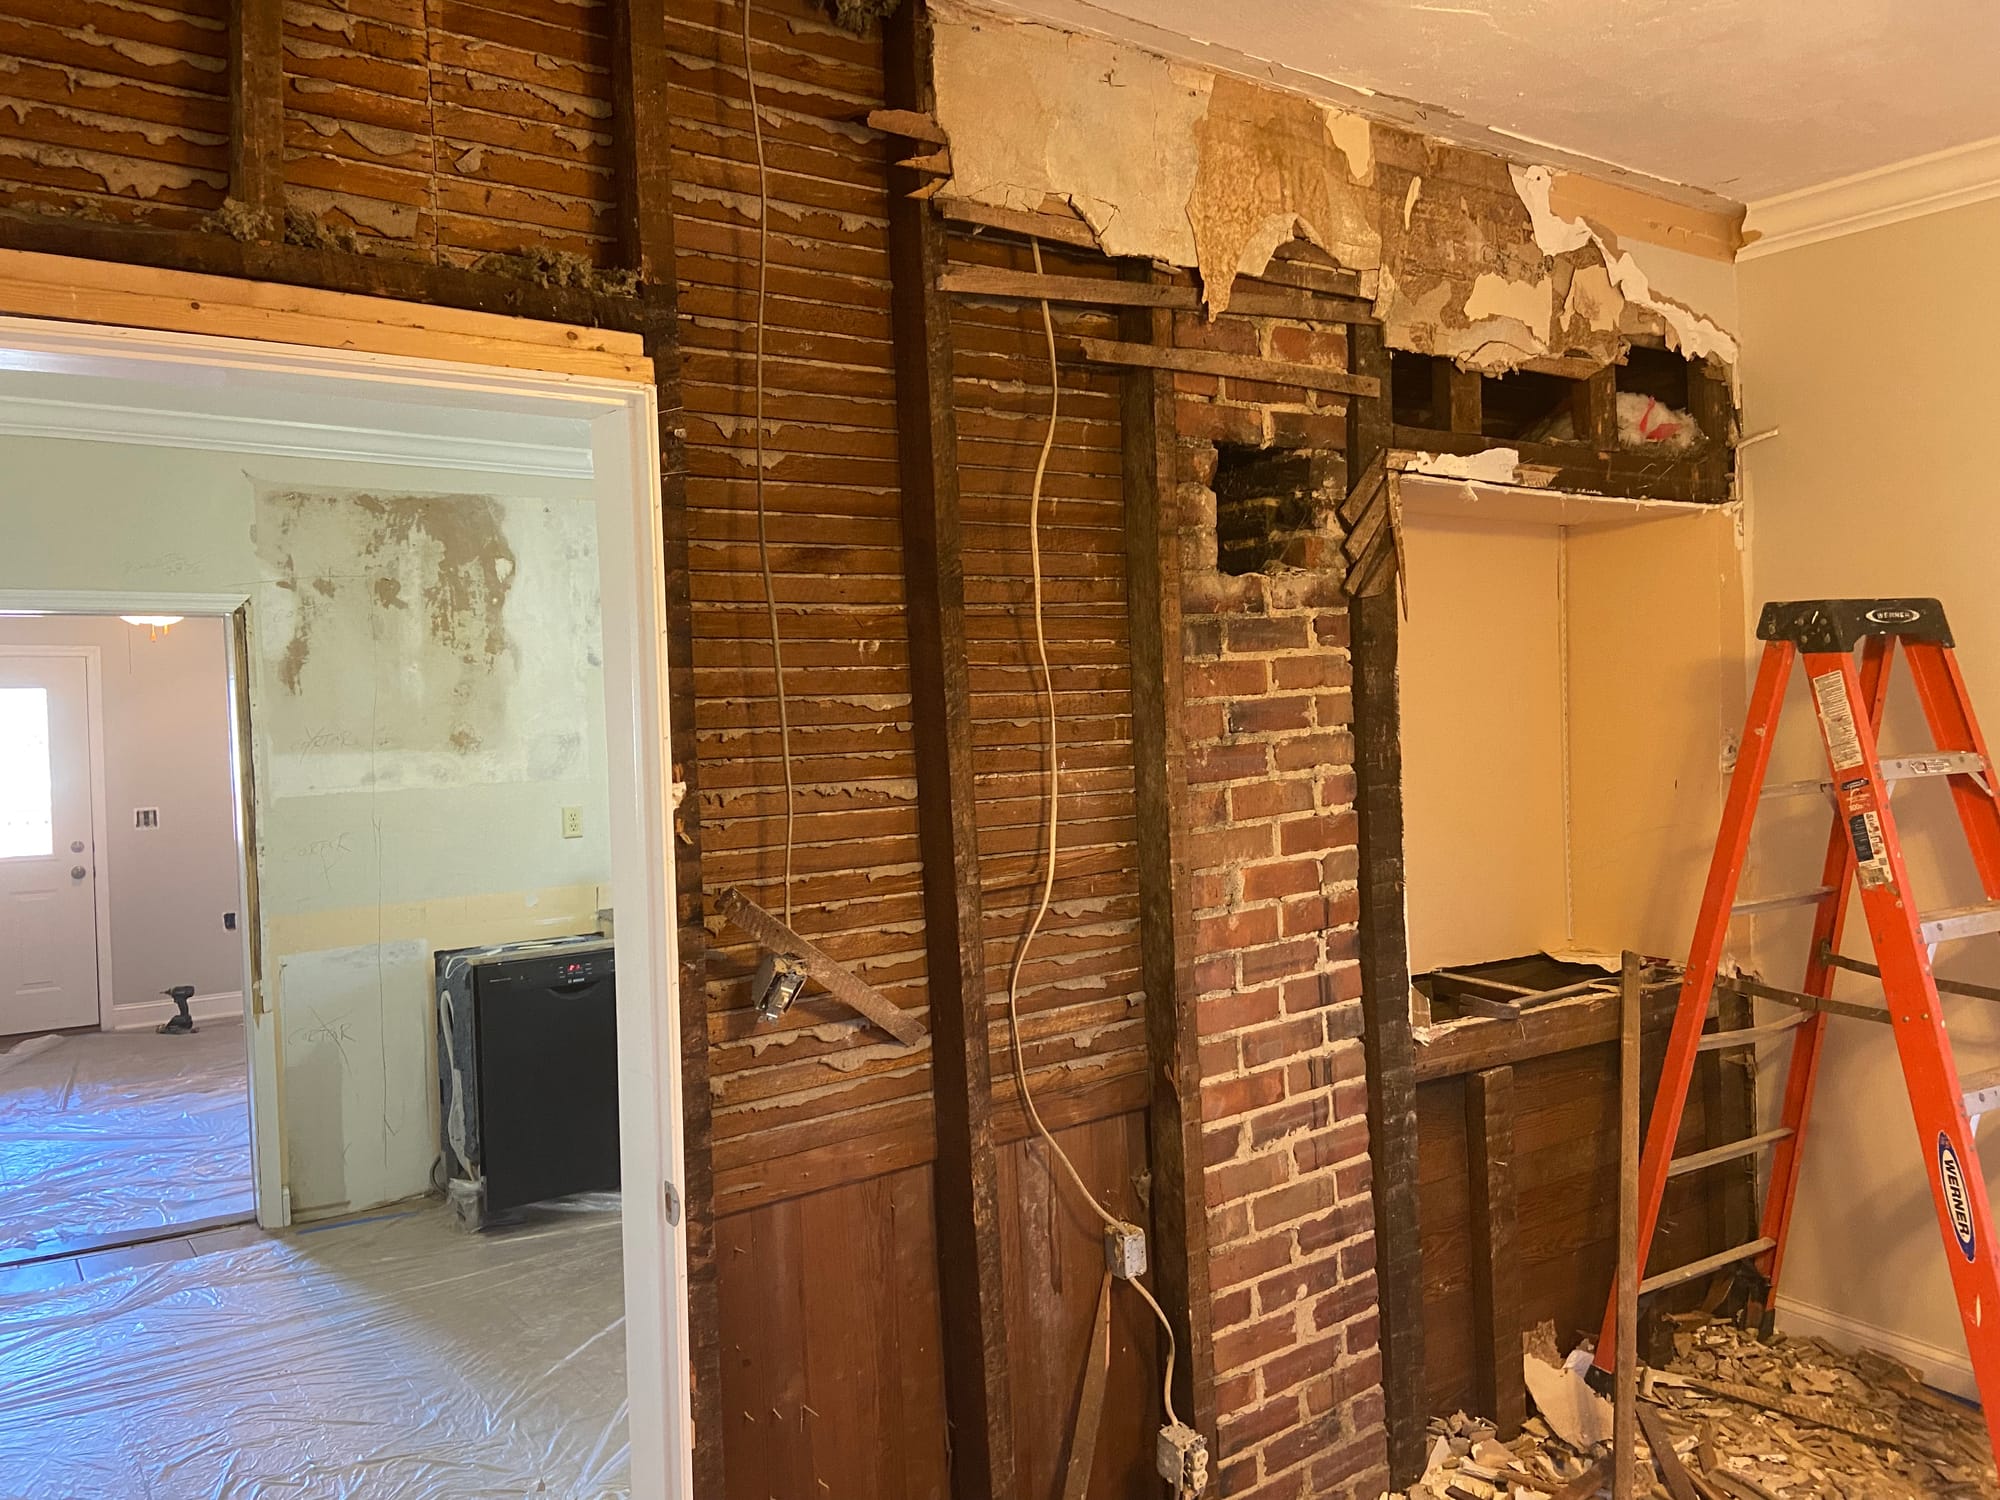
To create a more seamless "open-concept" feel for our living and dining room, (as well as expand the kitchen so our refrigerator could actually fit in the kitchen) we decided to remove a wall between them. This also meant we needed to move cabinets around to maintain storage and countertop space.

Now then, enough with the backstory, let's get to the action!
First, let's talk safety.
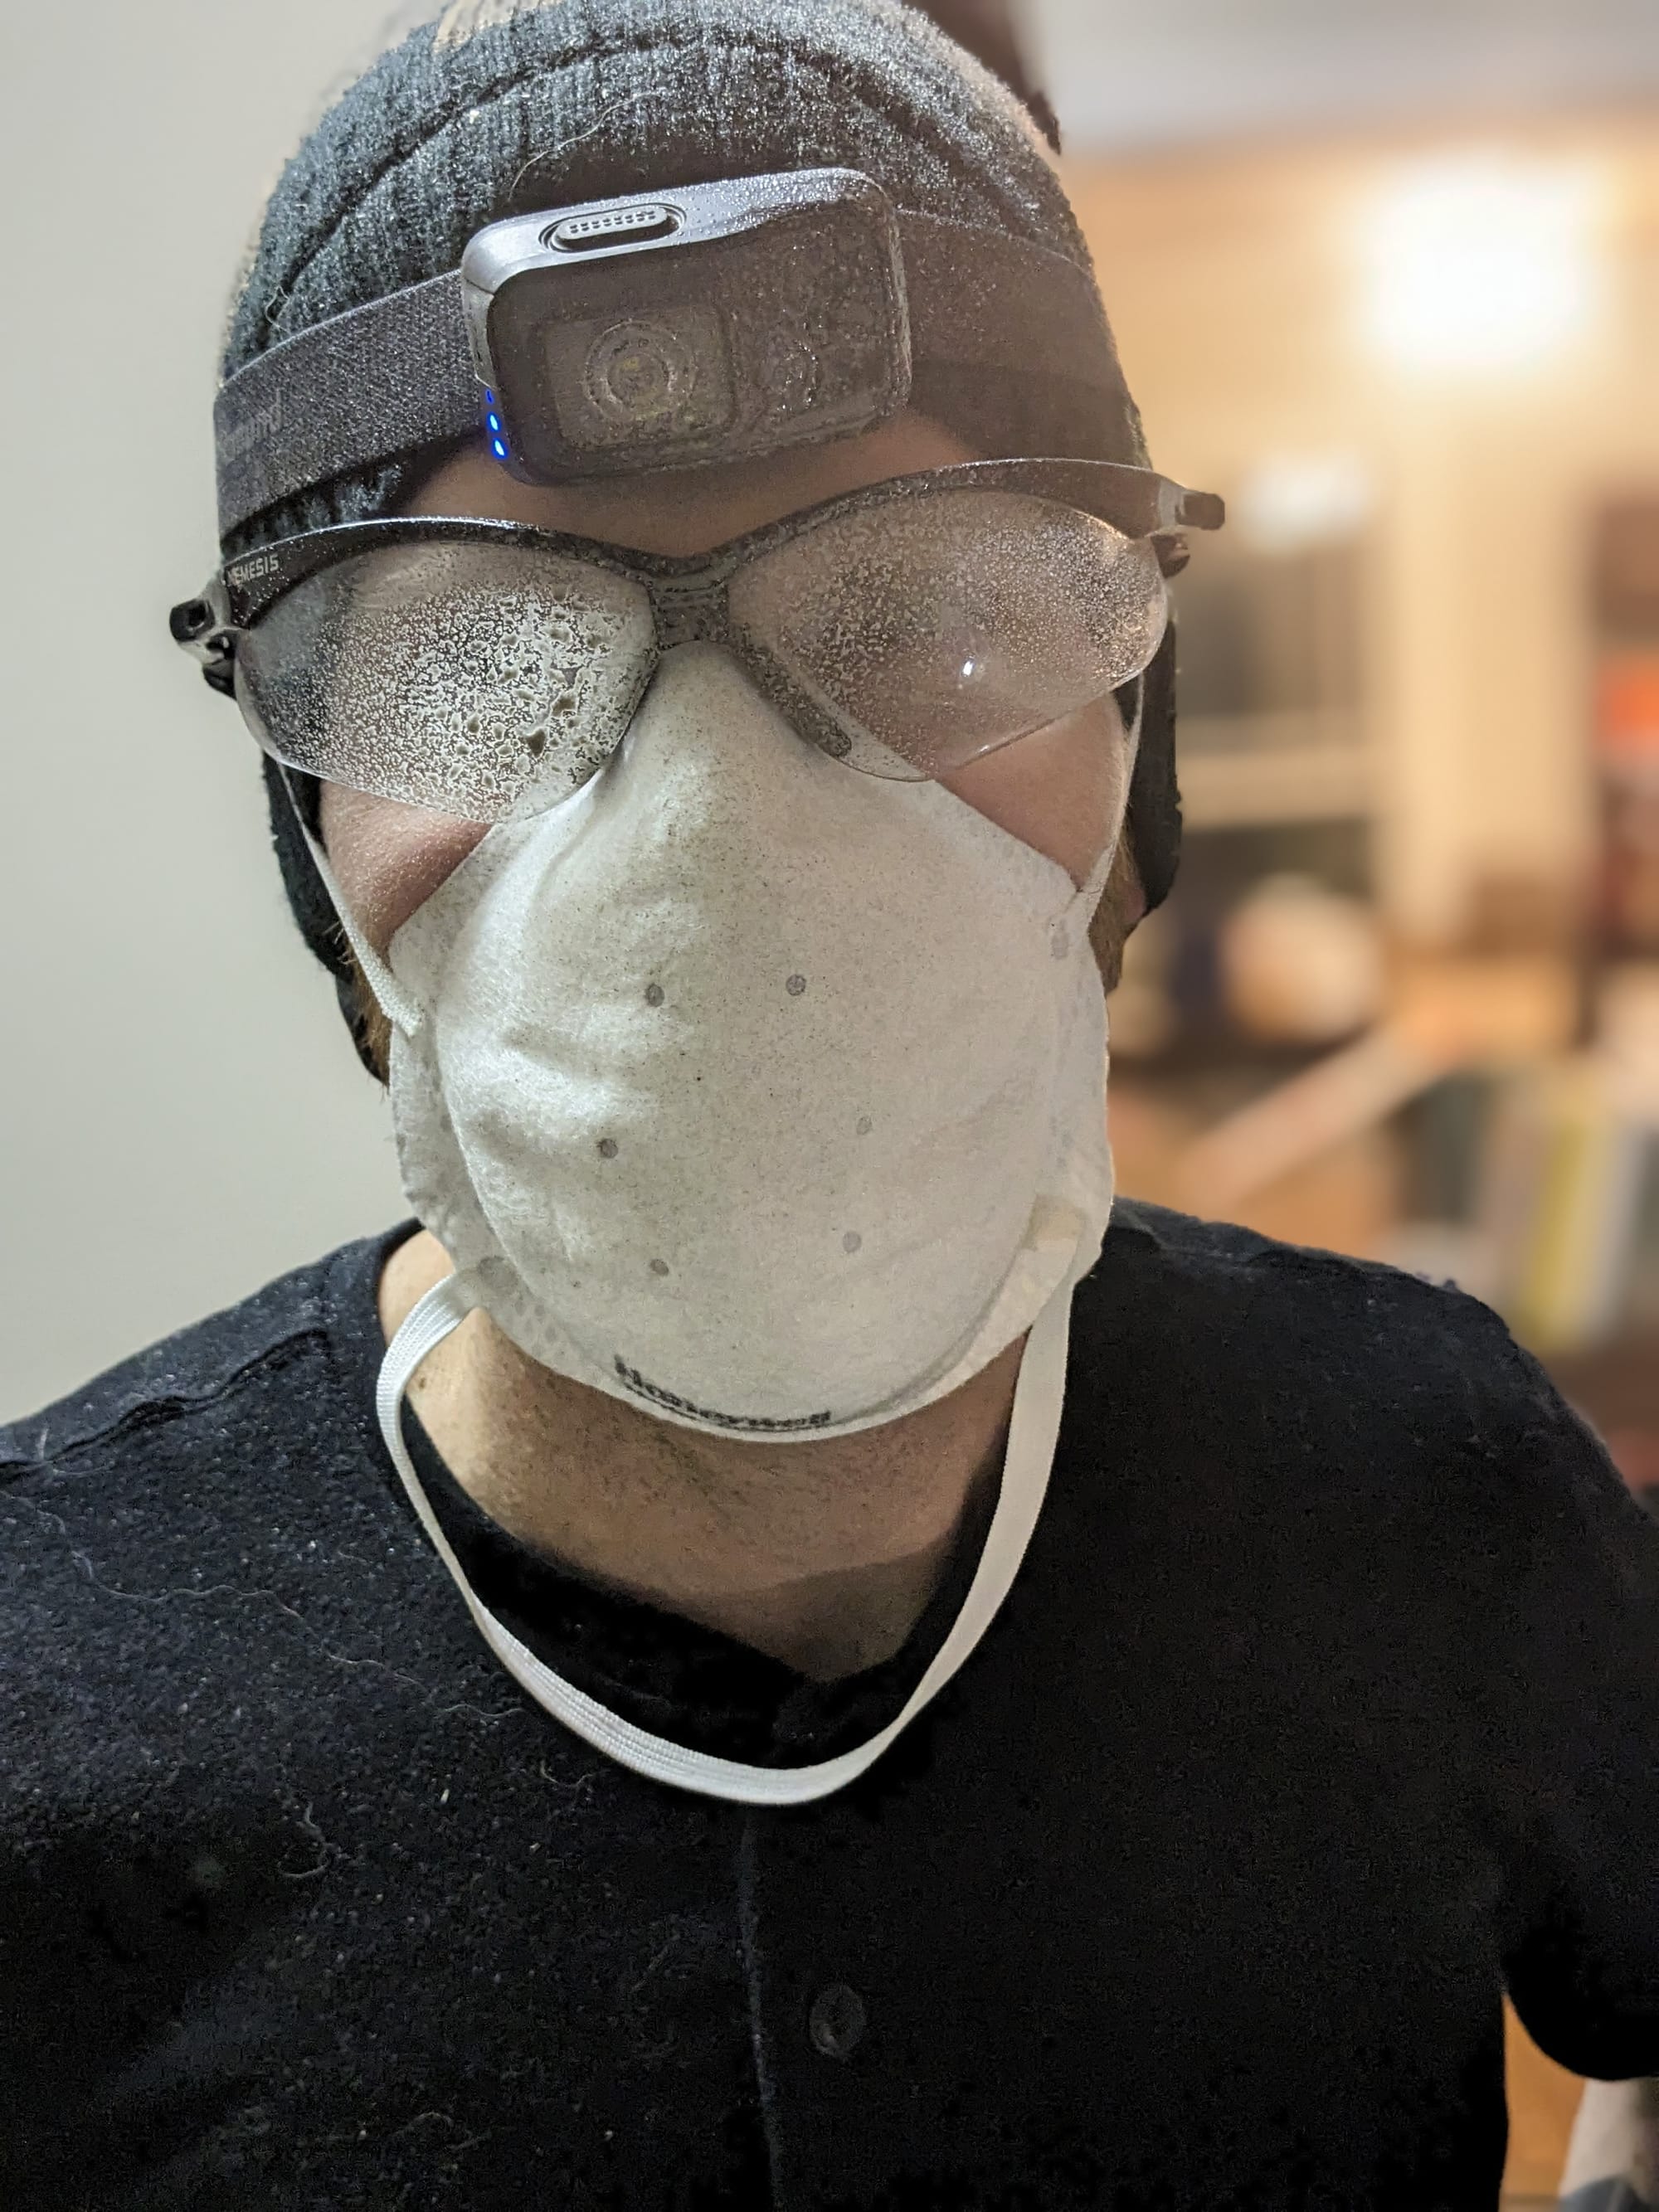
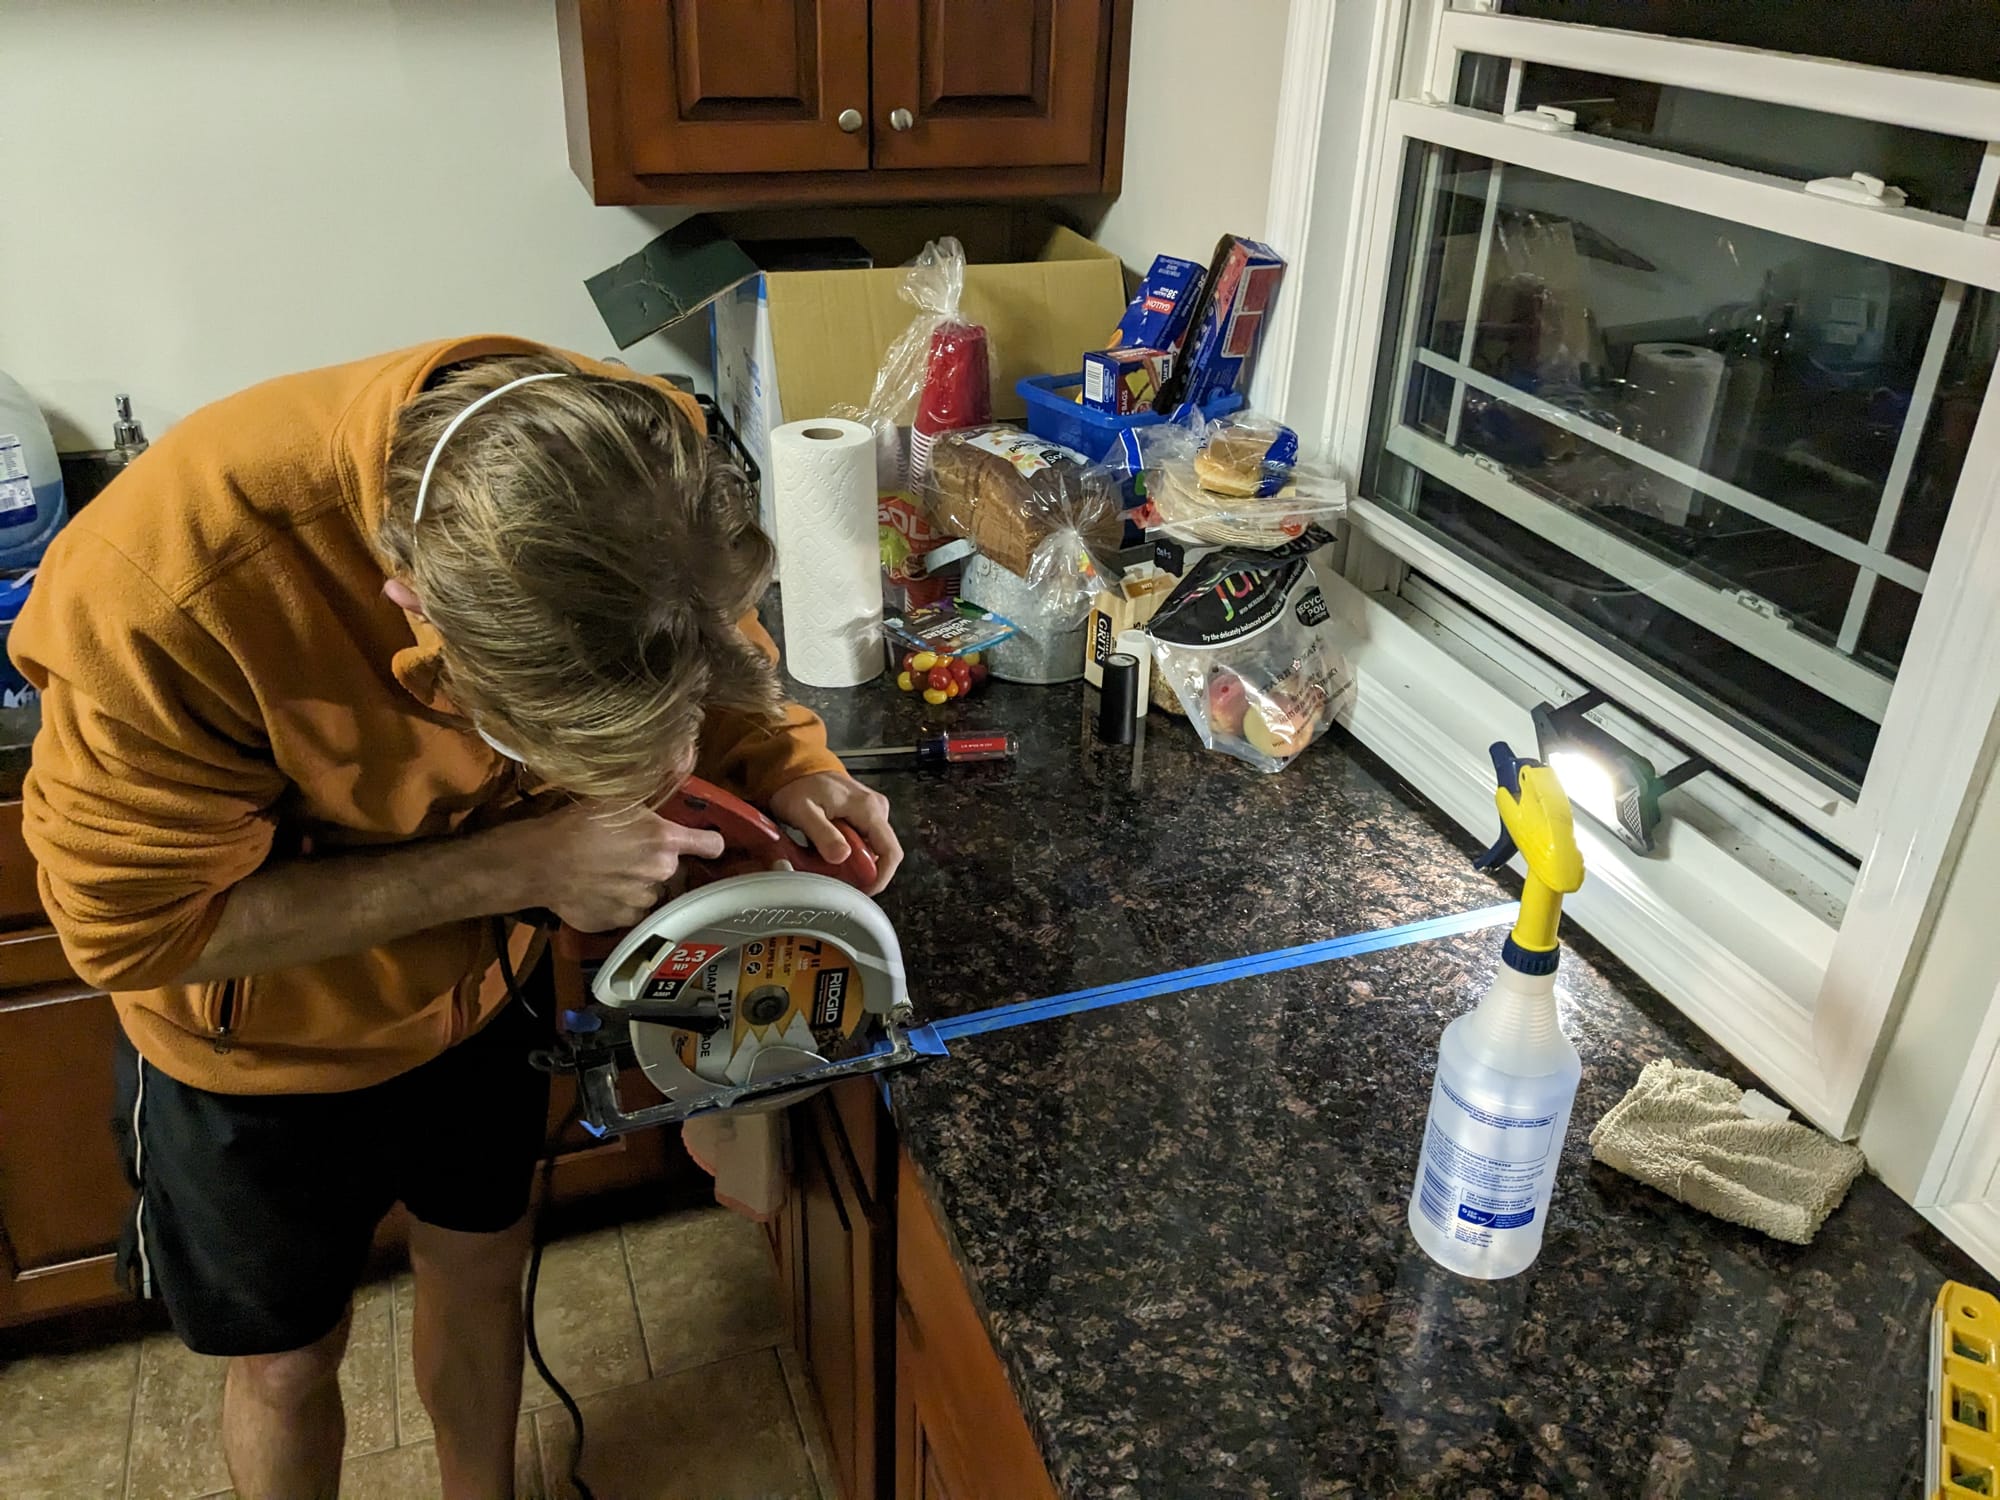
Regarding personal protective equipment (PPE), we always wore eye protection, and when cutting inside, we wore respirators and used a shopvac to cut down on the dust and debris. If you're able, cut the granite outside. This makes dust management much easier. The first 2 cuts we had to make inside the kitchen, but after that, we were able to carry smaller pieces outside to make the cut. That allowed us to use a box fan and shopvac to really control the mess.
You'll notice in the pics below, Dave is not wearing gloves. After reading many articles and forums online, he felt the general consensus was, if something goes wrong, the gloves won't help much in protecting your fingers from the blade, and can often get in the way. He preferred to go no gloves to have better hold and control of the saw.
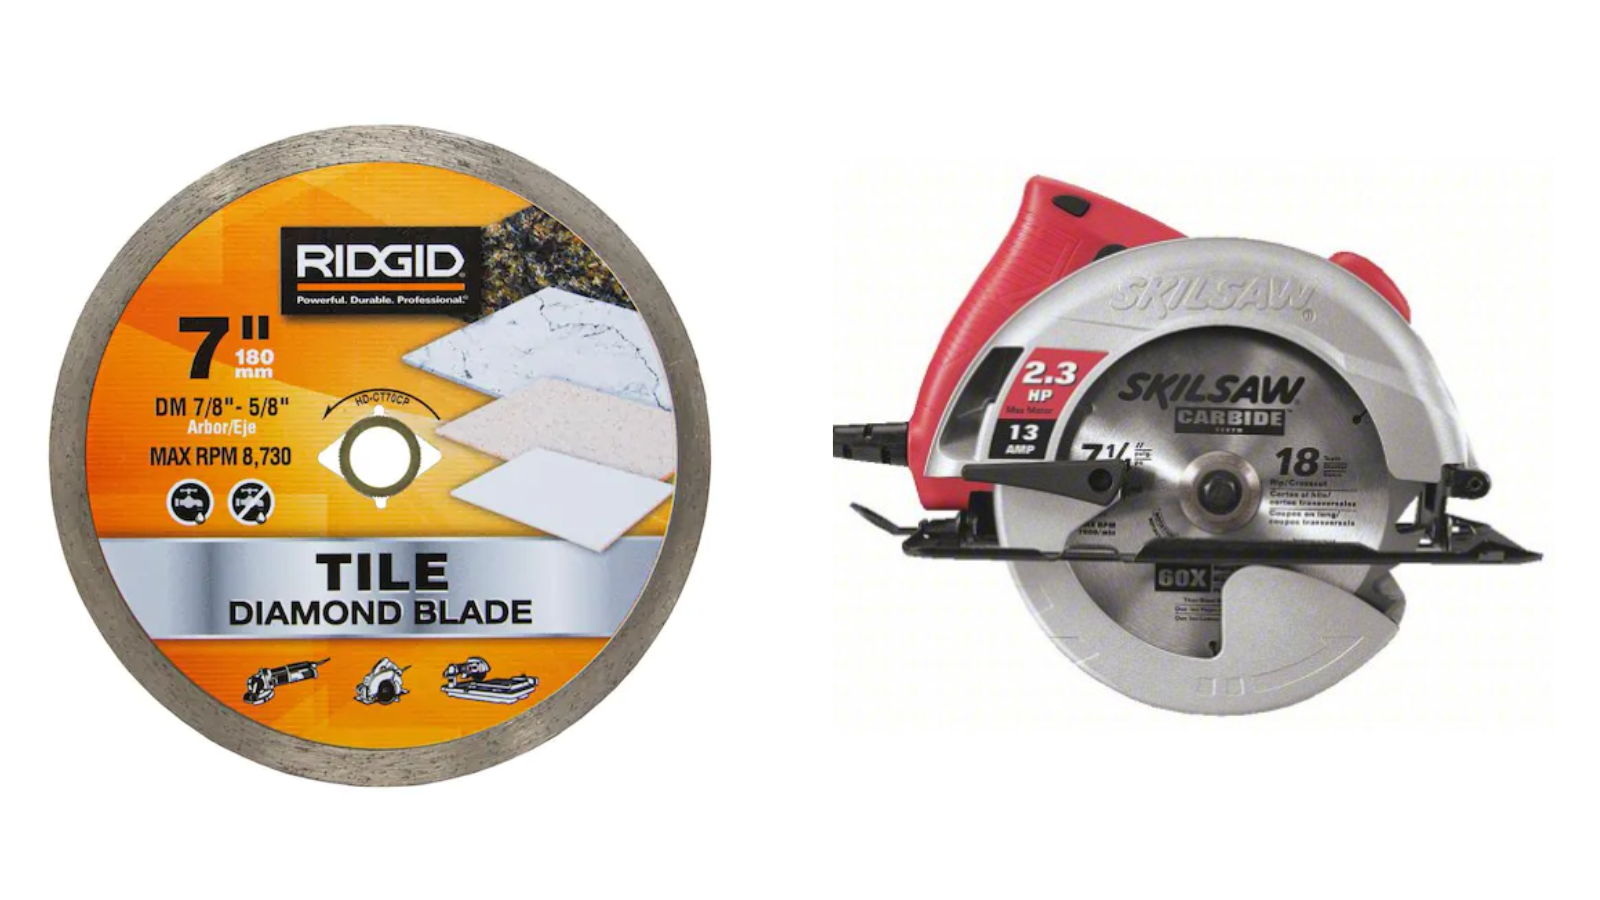
You're going to need a specific saw blade. There are many that will cut tile and masonry, but you need to make sure the one you purchase specifically mentions granite. The person we spoke with at Home Depot gave us some solid advice -
"Go slow, take your time, take breaks... going too fast can damage the saw, damage the countertops, or damage you."
We were aiming for zero damage all around.
We purchased 2 saw blades - one for the circular saw and one smaller blade that fit our angle grinder. (links included at the bottom of this blog)
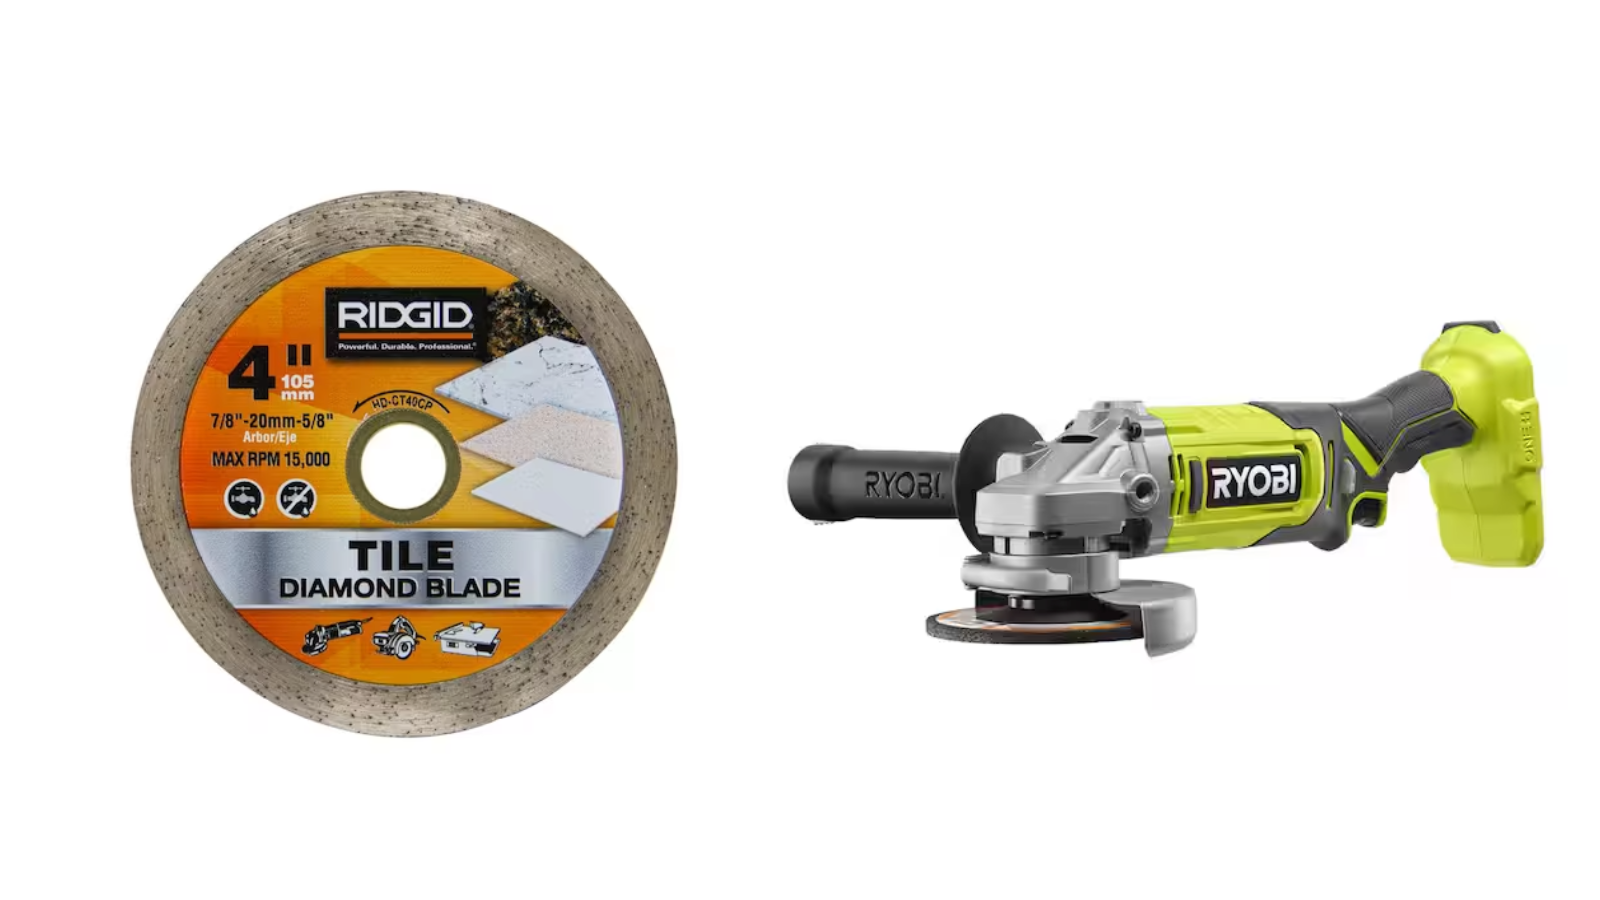
Dave used the circular saw for the majority of the cuts, and then used the angle grinder to finish the last 2-3 inches of each cut that were so close to the wall, the larger saw wouldn't fit.
Steps we took to cut our granite countertops:
- Measure about 4 times (because Dave...). Use painters tape and then mark the cut line with a sharpie.
- Set-up the blade depth on the saw. Make sure it's set so it only cuts through the granite countertops, and not the cabinets below.
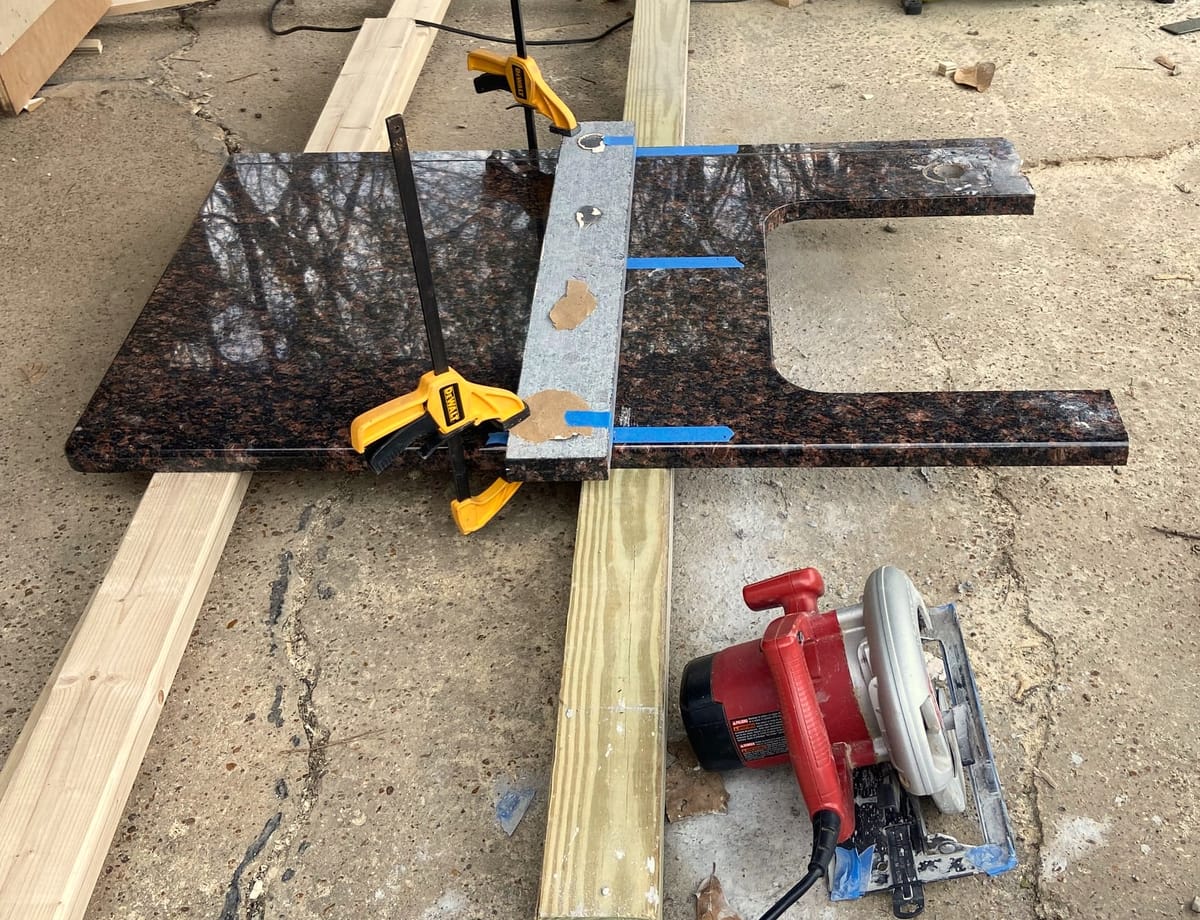
- Set-up shopvac, lights and squirt bottle full of water. Squirt bottle was used to keep the blade from getting too hot. You'll see sparks occasionally...stay calm, use squirt bottle 😄
Pro DIY Tip: DIY granite cutting is a team sport. It was really helpful for us to have 2 people - Dave cutting and Jen on dust and spark control.
Our first cut!
- Once the pieces are small enough for 2 people to move them outside, do that so you minimize the mess!
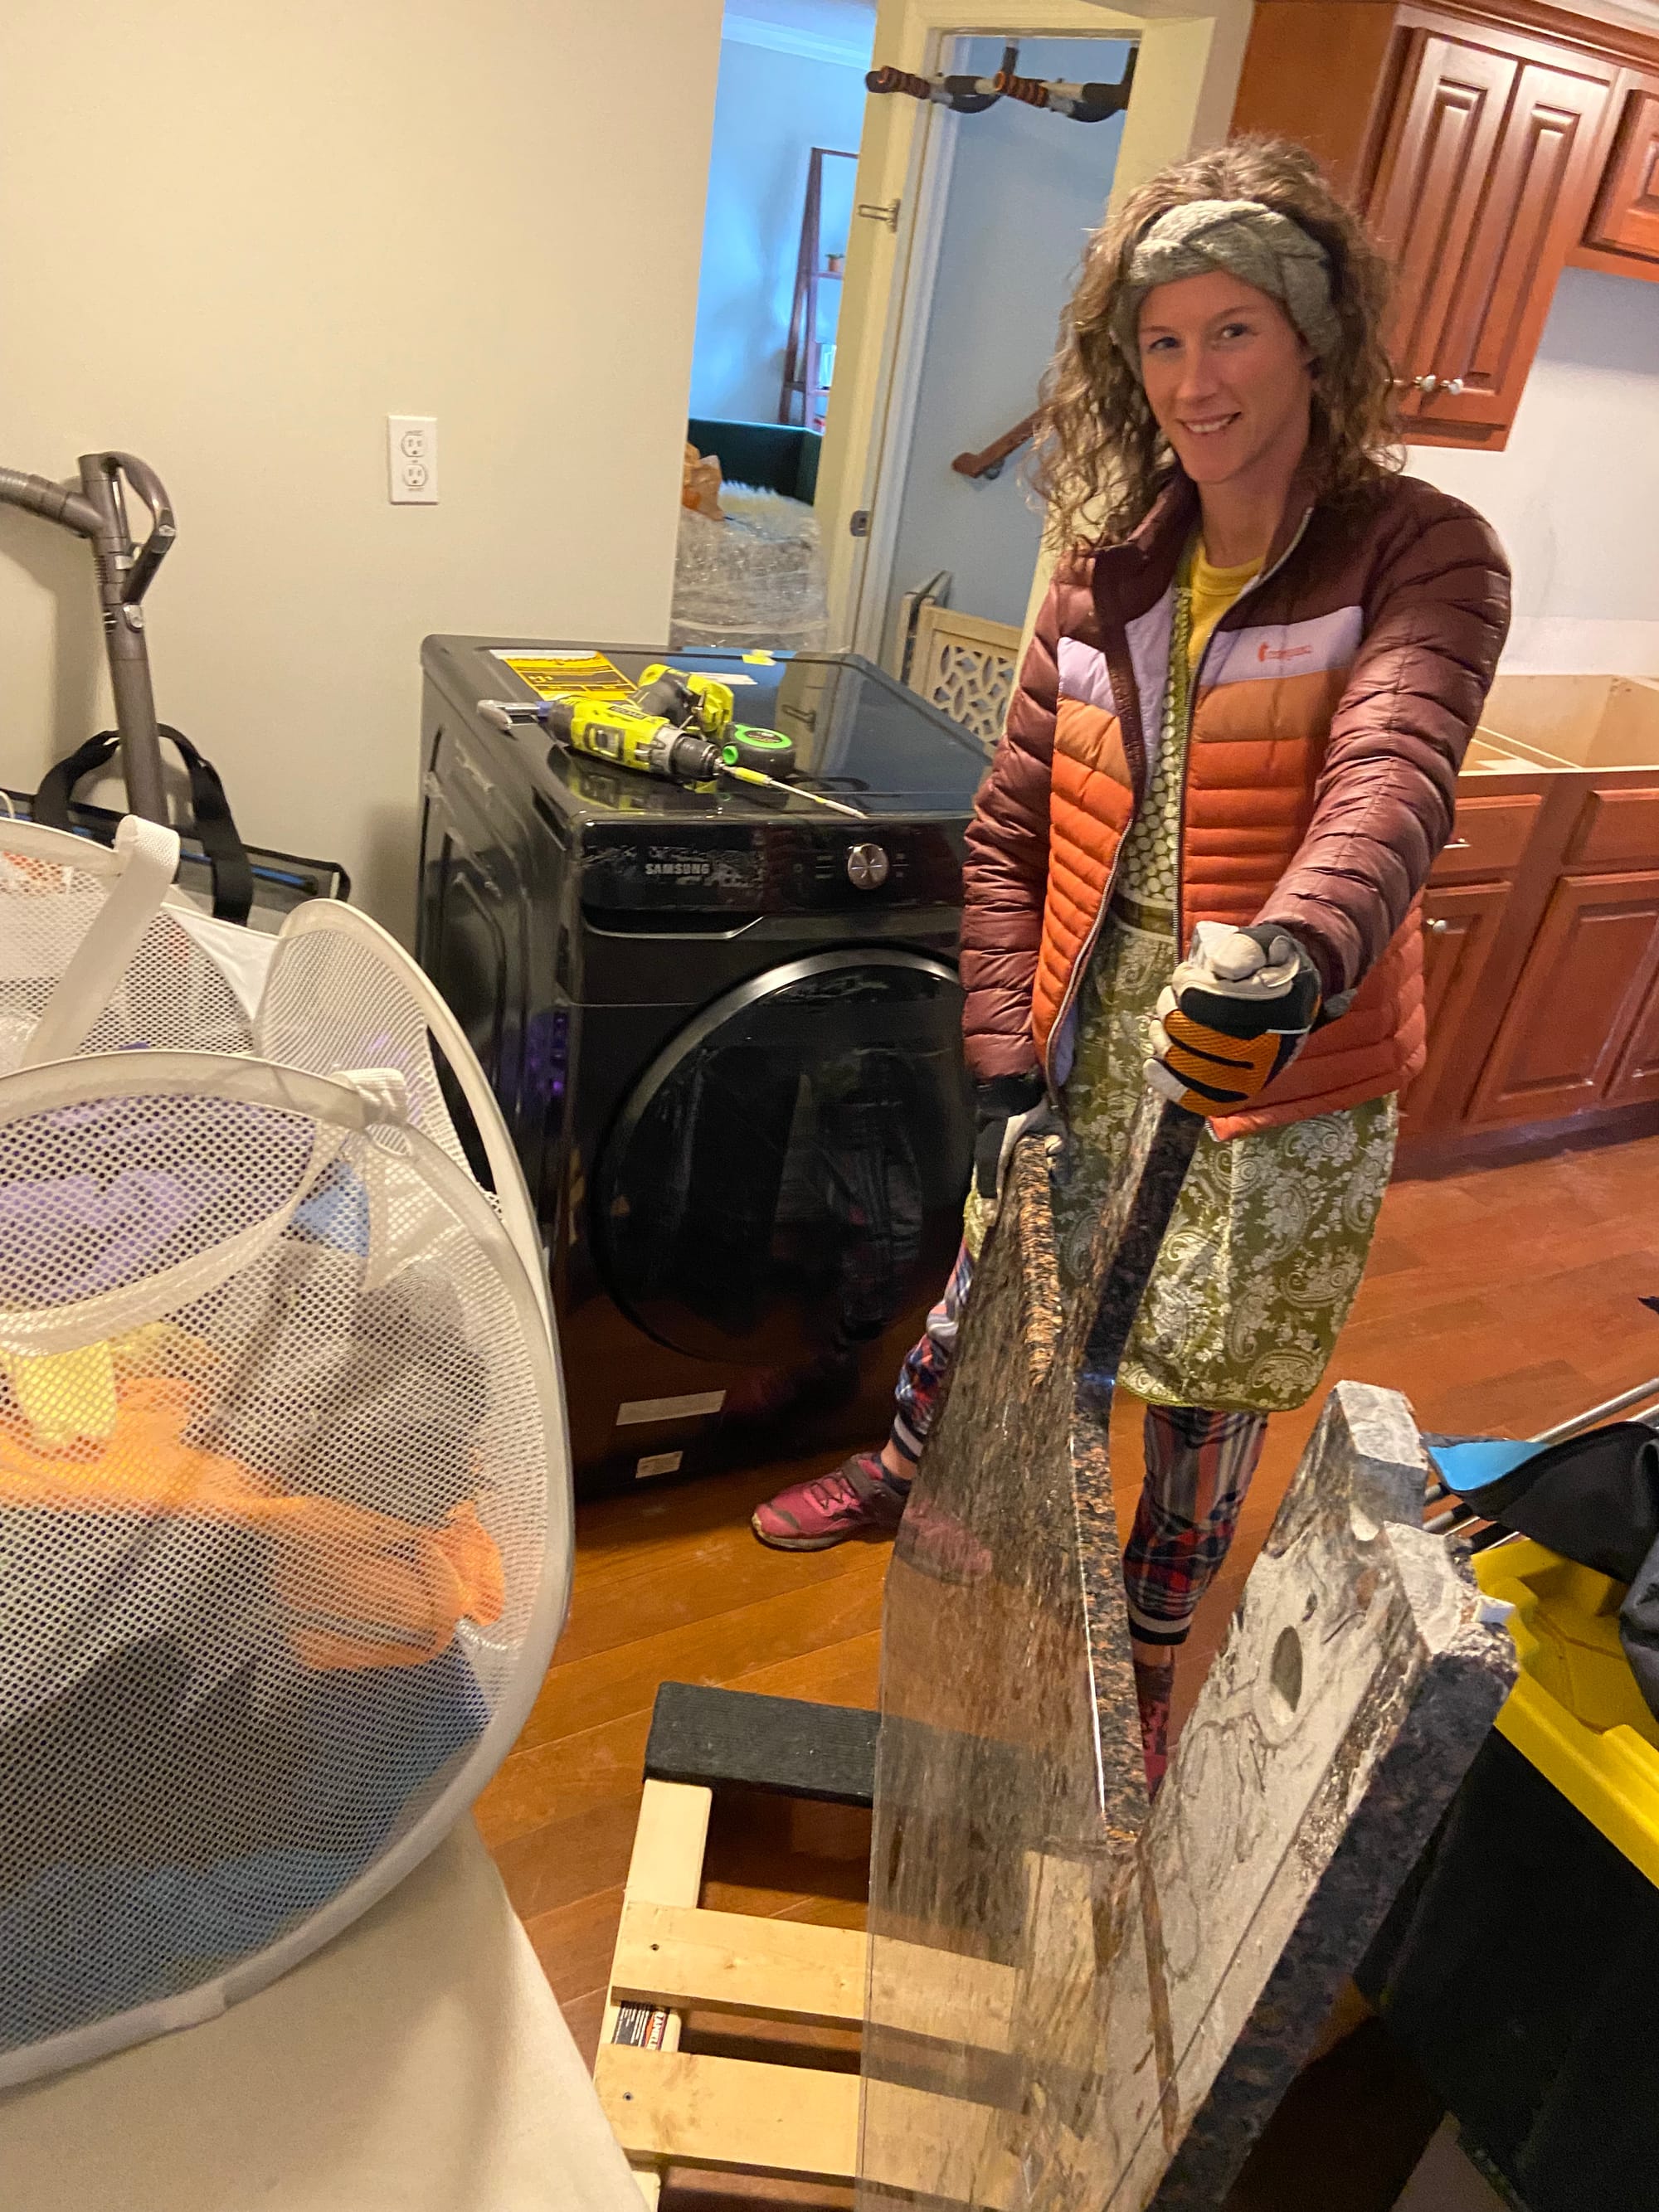
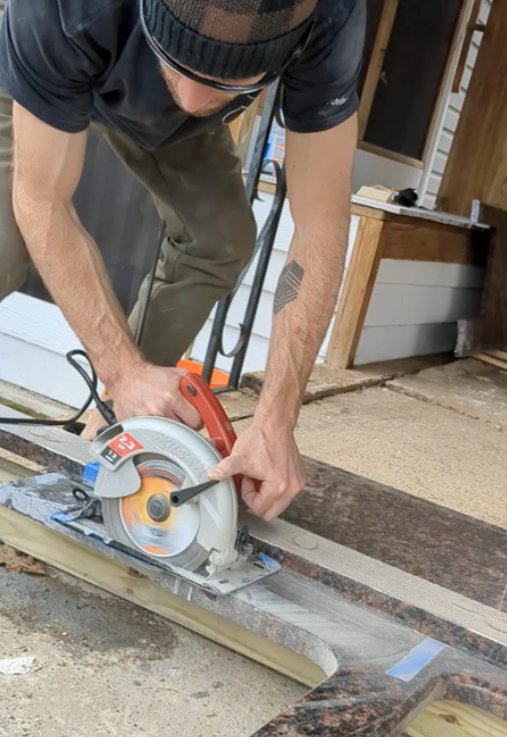
Dave found the most consistent way to ensure a perfectly straight cut was to clamp a 2x4 or spare piece of granite (i.e. 4in backsplash piece) to the countertop he was cutting, then just focus on keeping the saw up against that clamped straight edge guide. You can see this in the picture below. You could really only use this trick for the pieces we moved outside where we could get clamps on both sides of the countertop.

Pro Tip # 2: If you're having to push the blade pretty hard to keep it moving forward, you probably want to consider getting a new blade.
With a new blade, Dave was able to move the saw slowly but consistently, with medium pressure. After about 5 cuts, the first blade sort of hit a wall. Dave decided to go purchase a second blade for the circular saw. It was a game changer.
So, even though these blades are expensive, buying a few extra is significantly cheaper than purchasing new granite or hiring a professional to come out!
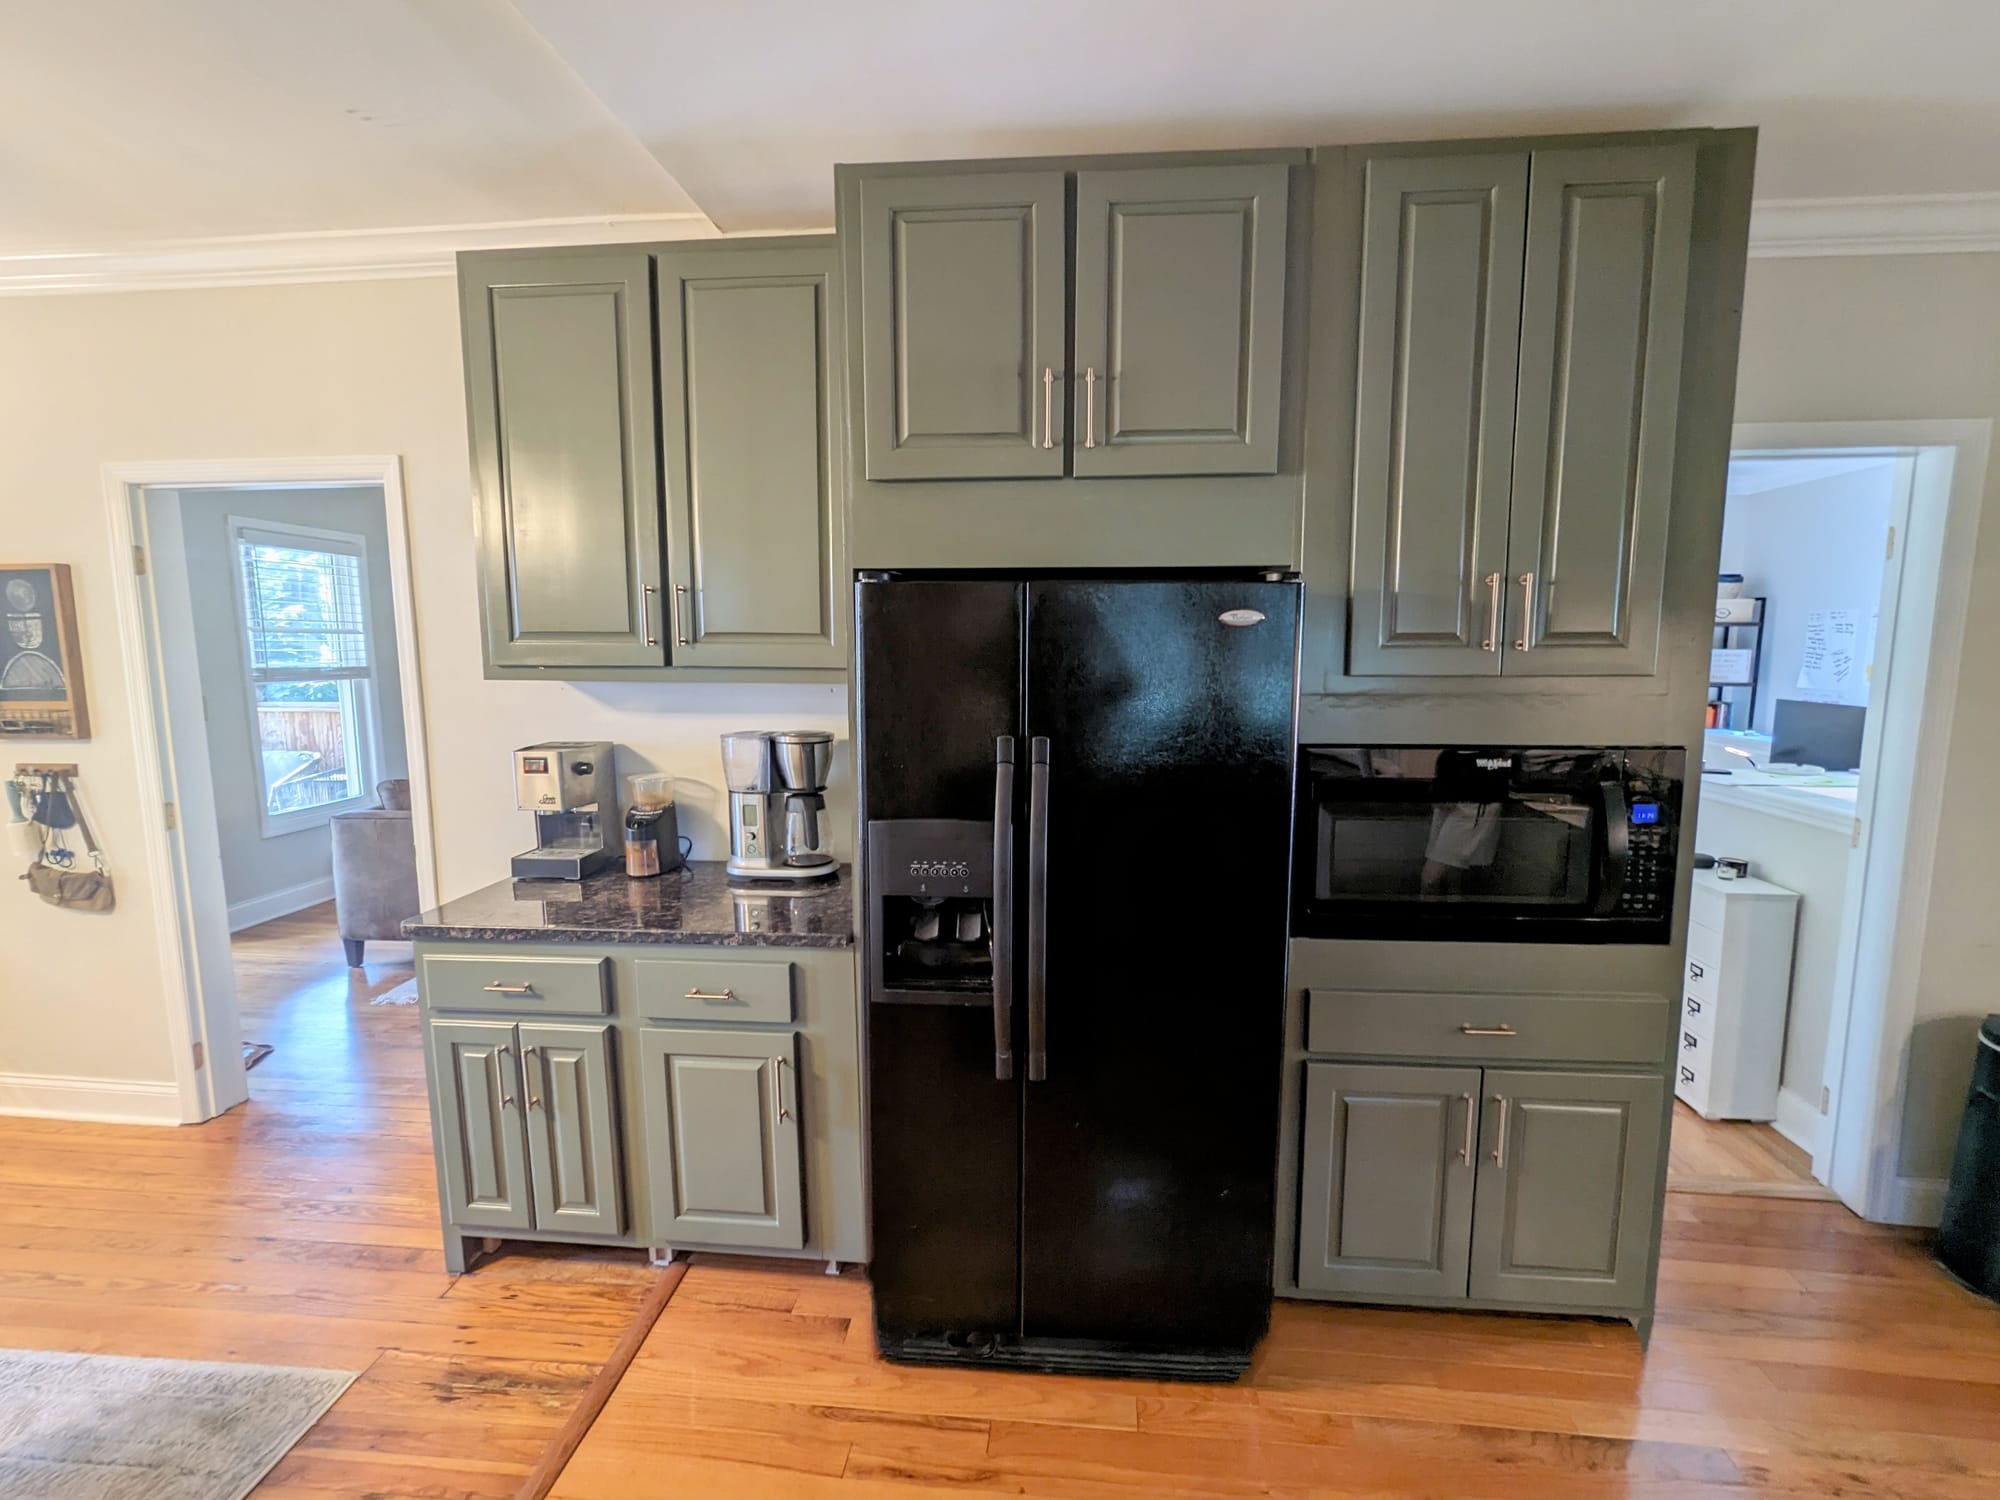
The Big Reveal
At last, the final before and afters - was all of that cutting and lifting granite pieces worth it? We think so 😄
Links to tools and supplies:
Rigid Diamond blade 7 inch - https://www.homedepot.com/p/RIDGID-7-in-Continuous-Diamond-Blade-HD-CT70CP/202882366
Rigid Diamond Blade 4 inch - https://www.homedepot.com/p/RIDGID-4-in-Continuous-Diamond-Blade-HD-CT40CP/202882364
Shop-Vac Wet/Dry - https://www.lowes.com/pd/Shop-Vac-5-Gallons-4-5-HP-Corded-Wet-Dry-Shop-Vacuum-with-Accessories-Included/5013492265